

Good Morning Everyone,
Marnie here with a box tutorial using Koi Tattoo for my focal image. I have a lot of graduations and various gift giving events this summer so I've created this lovely box to give some gift cards in. Just change the papers and images for each occasion and/or event.

Start with 1 piece of pattern paper 4 1/8 x 5 1/4" and 1 piece of cardstock 3 1/4 x 5"

Score the patterned paper at 5/8" on each side.

Score the cardstock at 3/4" on each side.

Fold each of your score lines. Crease with a bone folder.
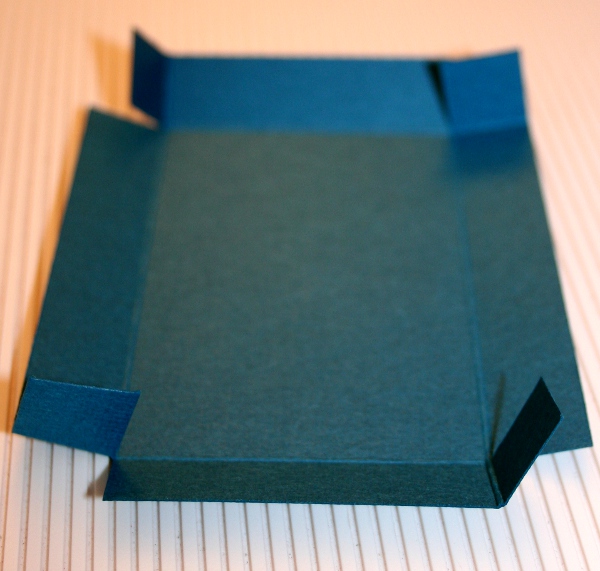
Snip one side of each of the corners to form each box.

Add a bit of glue on the outside of each corner square snipped.

Adhere to inside of strip next to it to form box. Repeat for all corners.
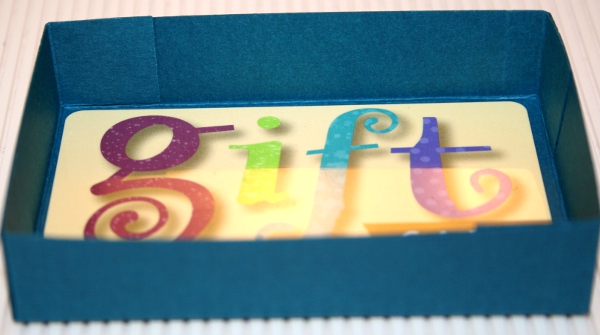
Base of box is now complete. Your gift card should fit perfectly.

Repeat all the steps with the patterned paper for the lid.

Lovely box.

Color and cut out a Bombshell image - I chose Koi Tattoo and my Copic Markers for coloring using colors to match my papers.

Add foam tap to the back of the image.

Tie box up with pretty coordinating ribbon.

Adhere image over knot to dress up your lovely gift card box.
Have fun creating little boxes for the perfect gift.
See You Soon! Marnie
Great tutorial Marnie! Your Koi fish box is gorgeous.
ReplyDelete